- After Effects Tutorial
How to Make an Intro in After Effects
Feb 28,2020• Proven solutions
One of the best ways to get that professional look to your videos is by adding a good quality intro to them, and with After Effects it isn’t as daunting a prospect as it would seem, you can create some highly professional intros using just the basic After Effects presets and effects.
This is a basic tutorial about After Effects, professional video editing software. However, if video editing is new to you, consider Wondershare Filmora, which can help you make unique and professional intros with ease. Download the free trial version below.
How to Make an Intro in After Effects
1Setup
First off we set up our composition, I’m using 320x240 for convenience of the web output but if you plan on using your intro on your YouTube channel for instance, you want high quality output that matches your video files, for most people these days that would be 1080p.
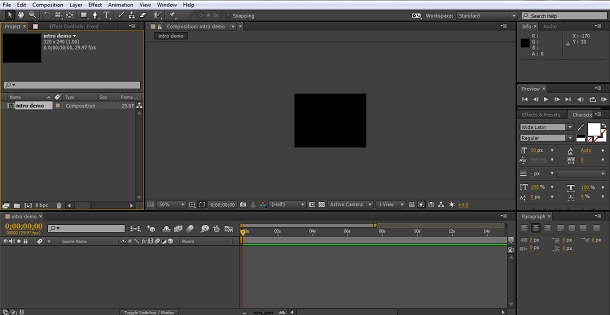
To this we add a solid layer by using Layer>New>Solid, I left mine Black but you can choose a color appropriate to your needs. On top of that we added our text layers by using the text button in the top menu with our title, YouTube channel name or similar on it, I used a separate layer for each word so we can manipulate them independently, and so finally we have this.
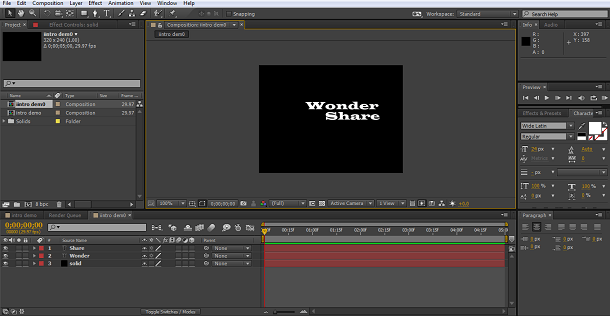
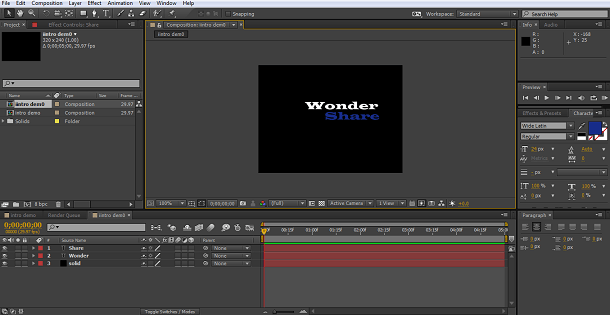
As you can see , we have our background, and two text layers, one with the word ‘Wonder’ in it, one with the word ‘Share’ in it. By hitting the selection tool (the arrow at the far left of the top menu) you can drag the text around to place them precisely as you want. At this point you should also make sure your text is a nice color to match either your branding or other factors. I’m going to change one word to a deep blue color to differentiate it, this is done by selecting the text and using the tools in the text panel to alter the color. Our final setup for the intro thus looks like this
2Adding the first effect
The reason I went to the trouble of having the text on separate layers is so I could have them appear at different times, I want the eternal part to come in second, so to do this I drag the layer along the timeline so it starts at the 5 second mark.
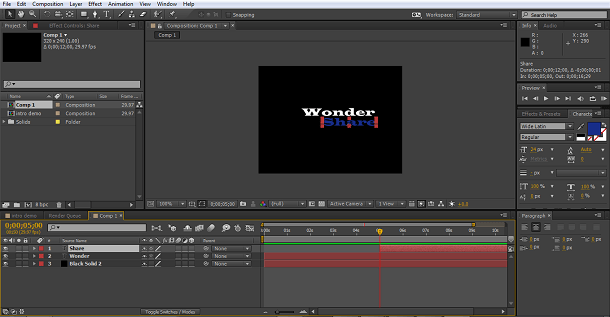
Now I go back to the start of the timeline and take ‘glow from the effects and preset tabs and drag it onto the wonder layer, I repeat this with the share layer to give a nice glow to both texts.
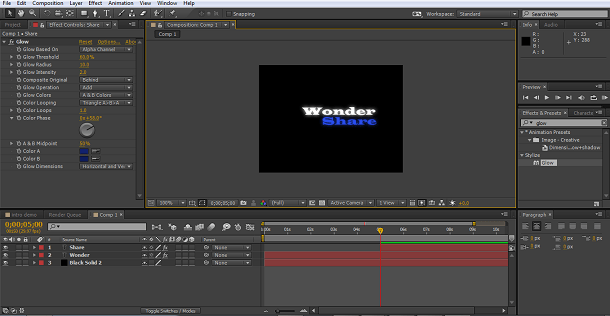
You can play with the settings of the glow effect in the effects panel to the left to get the look you are after, and that is our initial effect done.
3Adding in the Transition
As it is an intro, you don’t want your titles or brand name to just appear on the screen, and so here we use the effects within After Effects again. Highlighting the Wonder layer we select our transition. I picked CC Light Wipe as I like the effect, but you could try different ones to find your favorite.
Having applied the transition to the layer I now need to adjust it, I want the transition to finish as the second text appears at the 5 second mark. So I set my first keyframe for the transition at the zero timeframe point. I set the ‘completed’ value to 100% so the word is completely invisible at the start and then appears at the 5 seconds where I set the second keyframe with a completed value of 0%.
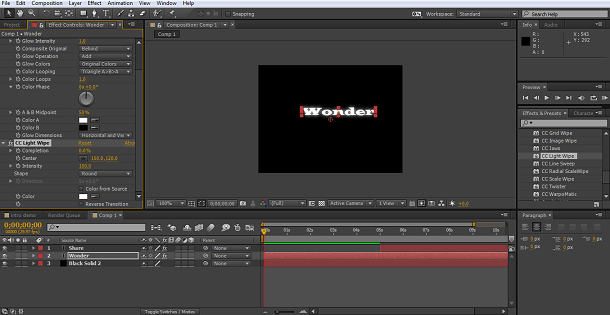
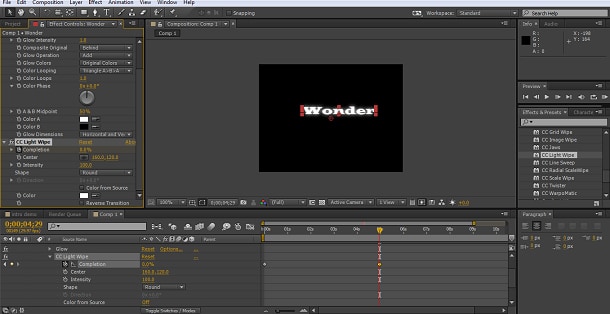
This is essentially running the effect in reverse but it still works well to my eyes. As we can see, the effect finishes one frame before the second word appears, but I don’t want that to just pop up, so we want to look at adding in an effect there too.
4The second Transition
You could use the same effect for both of course, I chose the CC Radial Scale Wipe, it’s just an effect I find pleasing. I added it to the layer, then set the ‘completion’ to 100% to ensure my text was invisible and set the first keyframe here.
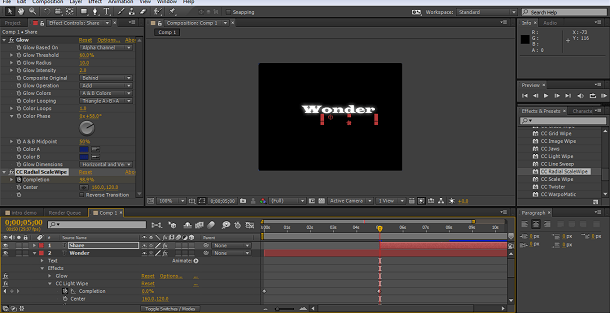
Then I moved the timeline on for 3 seconds to the 8 second mark and added the second keyframe with the transition completion set at 0%, so the word is fully visible.
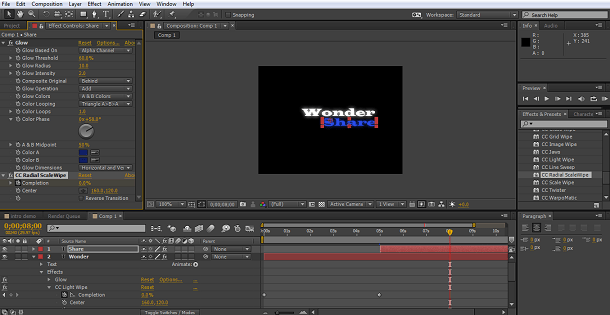
5Light sweep
To complete the effect, once the two words have appeared I wanted to add in a final flourish, and here I chose the CC Light sweep effect found in the Effects>Generate section, there are several to try, I just like this one.
In the settings tab I matched the light color to the blue of my text using the eyedropper tool, and set several keyframes so the light swept around the frame and faded out. The procedure is the same as other keyframes, setting the start keyframe for each attribute you wish to change, moving on the timeline, setting the next values and so on.
In this case I used the direction (to move it around the frame), sweep intensity and edge intensity (both reduced to 0 to fade out the effect) attributes to get the look I was after.
I started off by setting both intensity attributes to zero, so they would not show during the initial text transitions, I then added keyframes for direction and both intensity settings right at the point where the final text transition ends, this brings up the intensity and sets the direction of the light beam as I want it to first appear, then at 3 second intervals I set keyframes for the direction so the light travels all around the screen, and the final keyframes I reduced the intensity back down to zero for both sweep and edge settings so the effect essentially fades away at the end of the sequence.
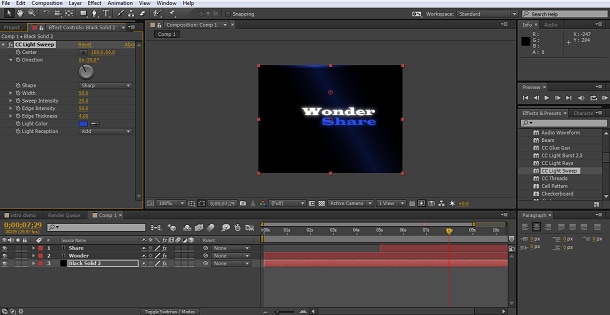
This means we now have a nice introduction where the individual words transition in and a light effects plays around them.
6Conclusion
That was a short into made just using the tools found within the standard After Effects library, as we can see it is not a complicated job to add some professional looking effects to the intros of your videos, I simply picked transitions and effects I happen to like, but there are many more included in After Effects id these are not to your tastes, if you are not sure what some of them look like and do not have Bridge installed to allow previews, simply add them to the layer and run through the completion setting to see what it does.
If you want to go further, you can buy many different plug-ins to apply other effect types, optical flare and other effect packages can be easily added, they work just like the presets and effects within After Effects itself and can expand on the possibilities you have.
Bring up your video to a professional level with straightforward tools.
Try It Free Try It Free


Liza Brown
chief Editor
0 Comment(s)